Jack Bell
Gameplay Programmer/Designer
Technically minded designer with a proven history as a development lead. Specialising in XR Design, novel game mechanics, integrating discrete systems, and IoT applications.
Published works

SUSHI BEN

I was brought on to the Sushi Ben team shortly after graduating to help see the game to its release. Initially my role was only to verify quests were completable in both VR and “Flat,” but I was quickly promoted to one of the primary gameplay programmers in the months leading up to launch. My primary focus then shifted to overhauling the minigames — notable Table Tennis — to ensure they functioned seamlessly in both the VR and “Flat” modes. I also integrated new mechanics to give these minigames more depth, and to make them more fun! I continue to work on the game, helping to patch bugs post release.
Completed Projects

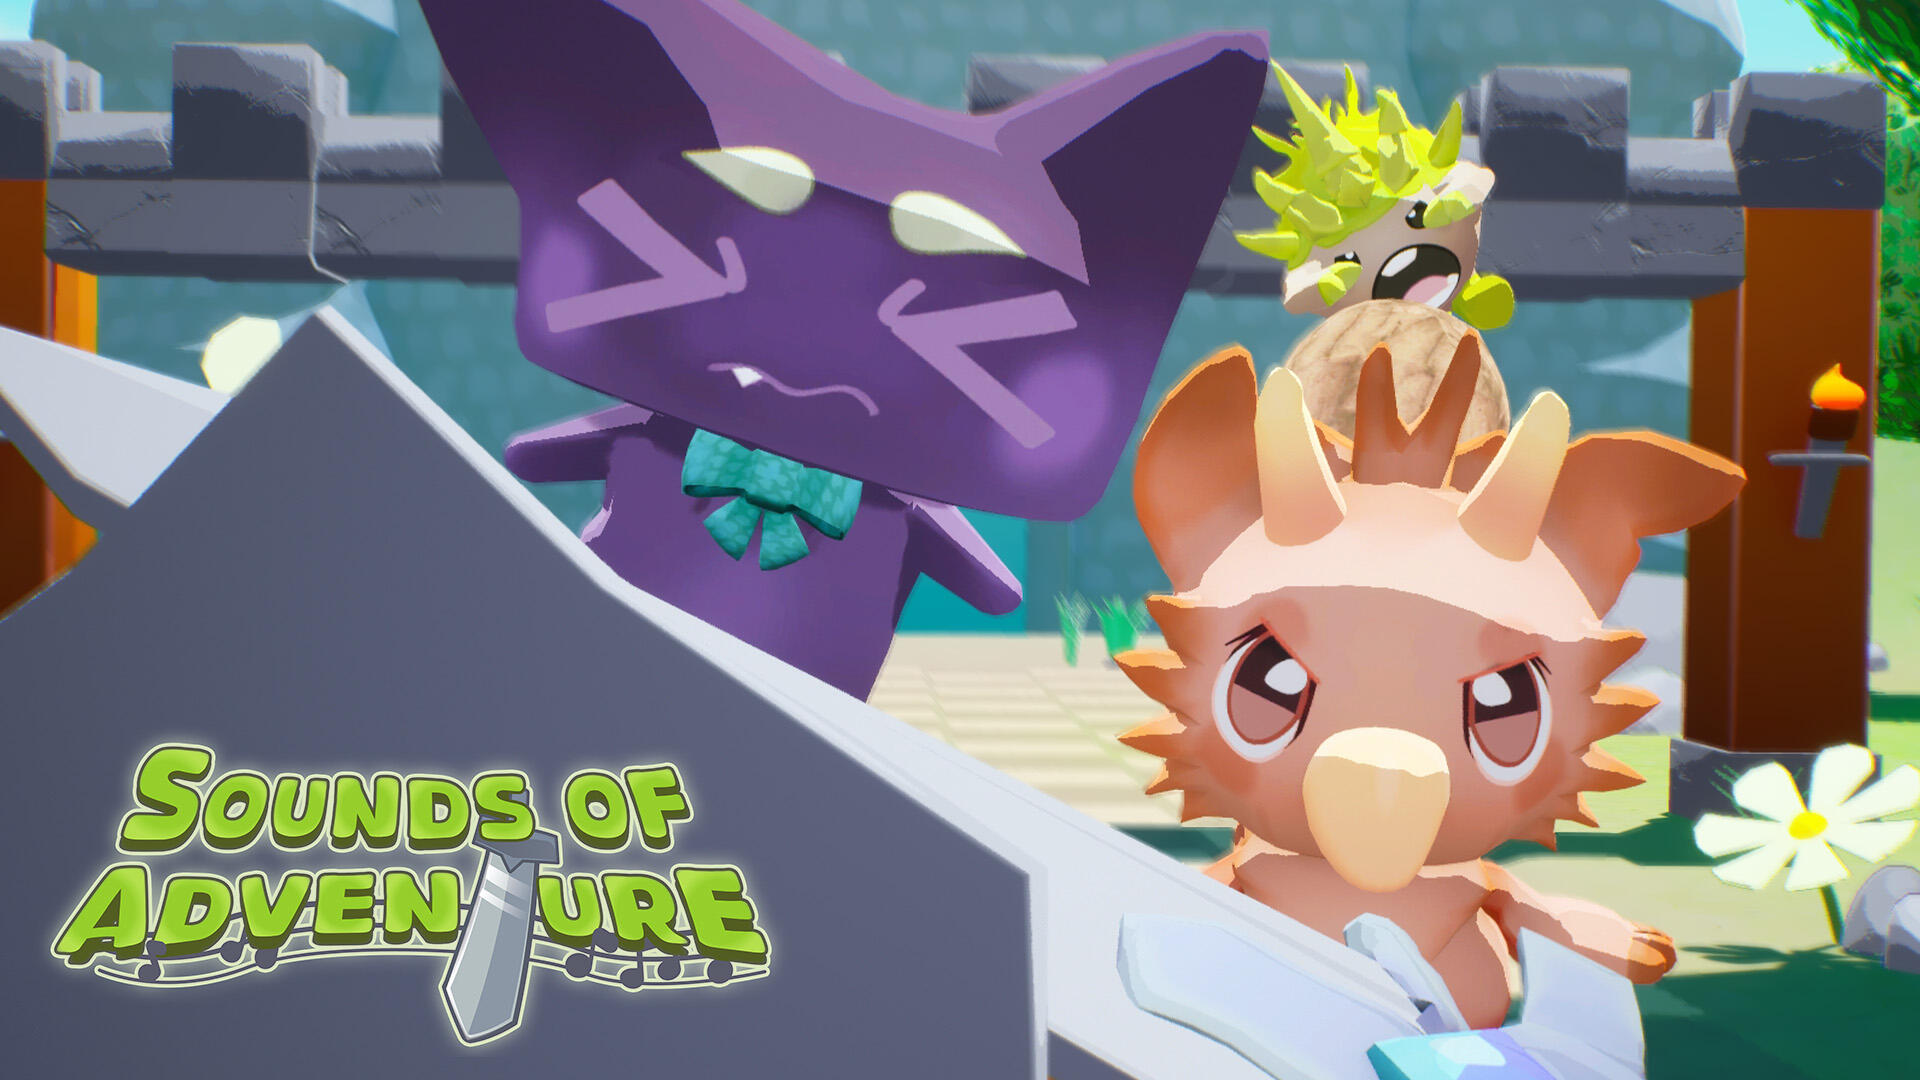
Sounds of Adventure
Completed Project
VR Rhythm Game Demo
Unreal Engine, PC VR + Tracking Hardware
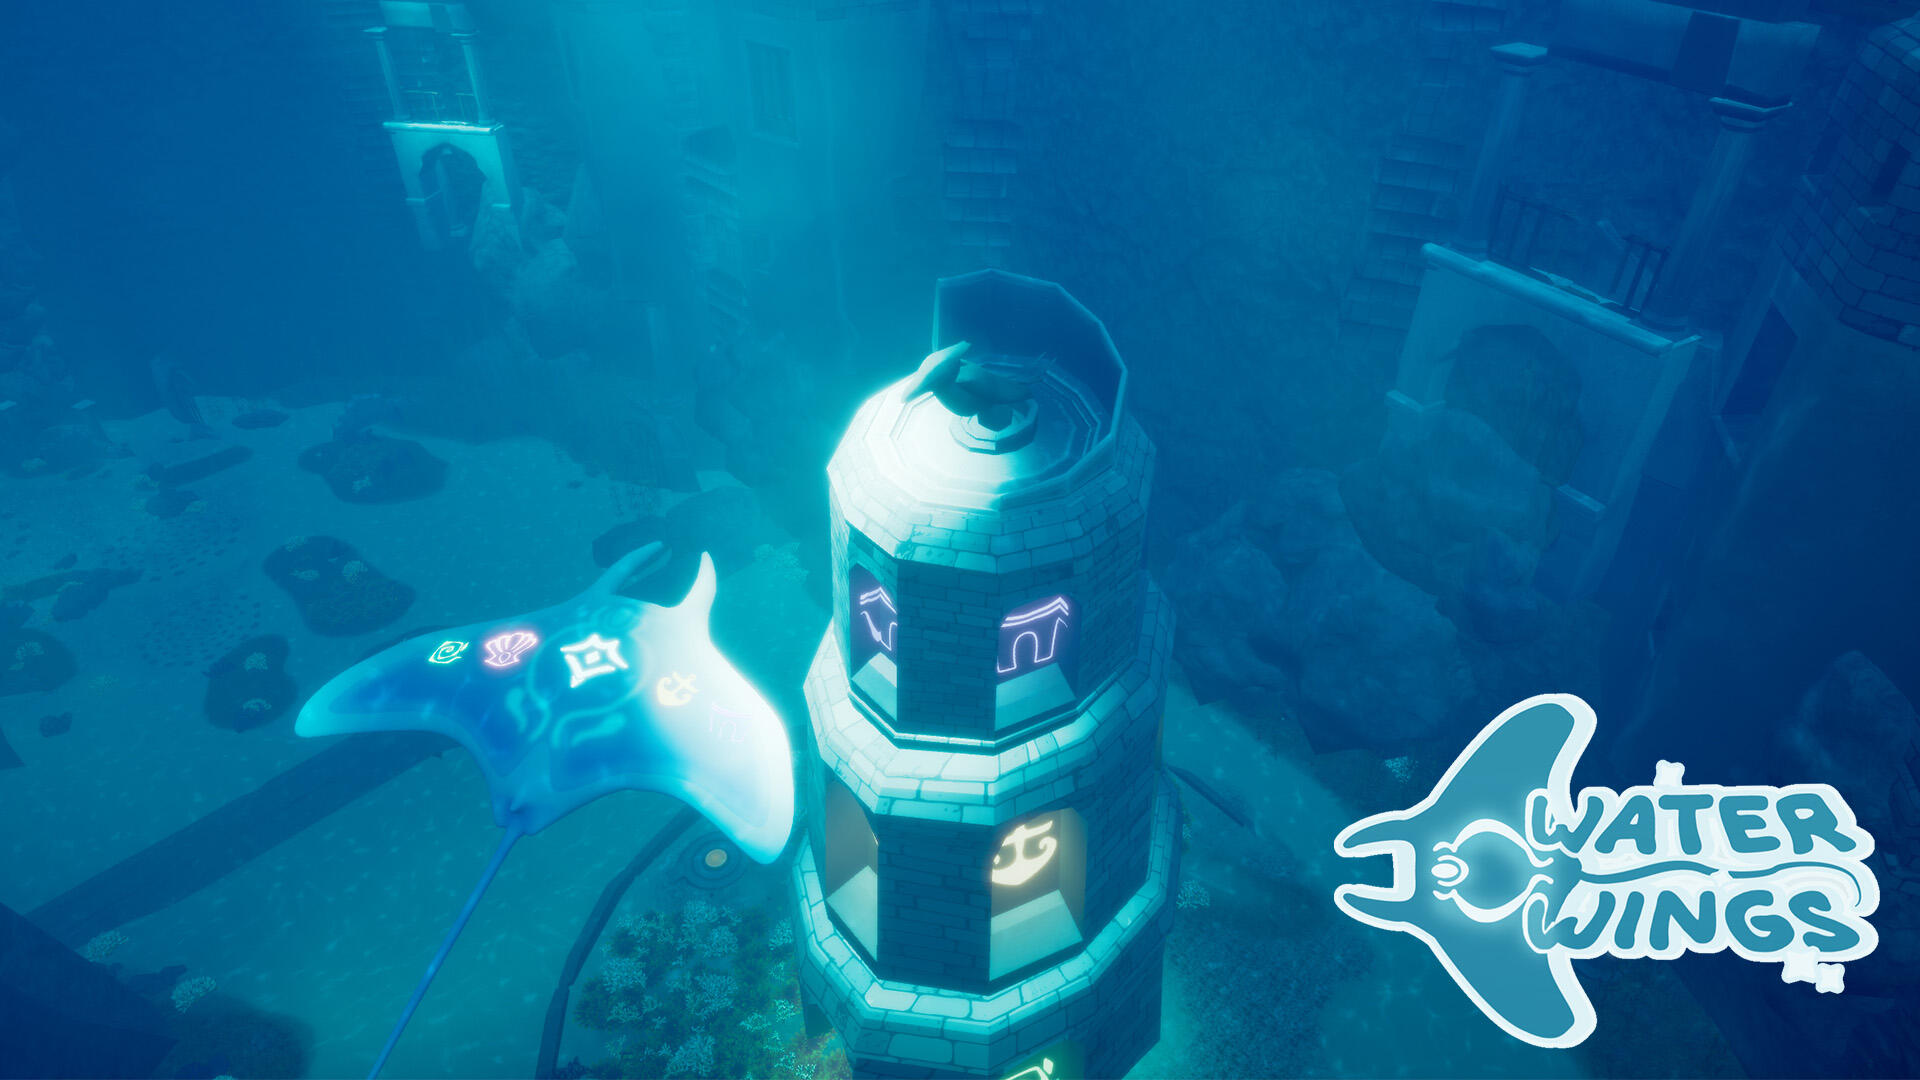
Water Wings
Completed Project
Limited-mobility Therapy VR Experience
Unreal Engine
Arcane Melodies
Tech Demo
XR Stage Video + Interactive Environment
Unreal Engine, LED Volume
Synth Wave
Tech Demo
Tech and VFX Showcase
Unreal Engine
In Progress

Zen Dwarves
Cozy VR/Flat Digging Game
Unreal Engine
Cooking with Magic
DESCRIPTION
Unreal Engine


Jack Bell
Gameplay Programmer/Designer
Technically minded designer with a proven history as a development lead. Specialising in XR Design, novel game mechanics, integrating discrete systems, and IoT applications.
SUSHI BEN
Sushi Ben is an anime-inspired ‘slice of life’ game about arriving in a new town, and helping save a sushi restaurant from land sharks. The game also can be played in two modes, VR and “Flat” (non-VR PC and Console), which added to its backend complexity. I met the game’s creator while finishing up my degree and, upon graduating, joined the team to help see the game to its release.Initially my role was only to verify quests were completable in both VR and Flat — and to make minor patches to them, where appropriate — but I was quickly promoted to one of the primary gameplay programmers in the months leading up to launch, and my primary focus became overhauling many of Sushi Ben’s minigames to work in both modes, as well as adding additional mechanics to make these minigames more fun — such as the ‘spin’ system in table tennis, and the spark particle in the stone carving game.I’ve stayed on since release and continue to help the team patch bugs and softlocks, particularly focusing on things related to the systems I worked on, such as table tennis.
General Polish
When I was first brought on, a lot of the work I did involved the [Flow system] (https://github.com/MothCocoon/FlowGraph) : a fantastic plugin that allows for easier development of quests/narrative structures via custom nodes and a custom graph. My work with it on Sushi Ben was mostly just making sure events triggered in the right order — that the player took their first bite of sushi before the NPC they’re dining with does, or making sure it’s the right time of day when a quest starts, for example.
As I got more acclimated to the project’s architecture, I began working with more of the actual blueprinting. Most of my initial work here was more bugfixing and polishing, primarily involving the game’s companion character, Maru, and making sure his ‘special states’ (like being a statue and being stuck to a tentacle) worked correctly in the game’s Flat mode.
Table Tennis
Thanks to my prior experience working with VR and Unreal, I became swiftly very acclimated with the project’s code base and was asked to work on the Table Tennis minigame within the first few weeks of my employment. When I began working on it, no progress had been made porting Table Tennis to Flat and the minigame could only be played in VR. In VR, the opponent could hit the ball anywhere on your side of the table.
To hit the ball back, the player physically swings their paddle at the ball and the ball’s speed is determined by the velocity of the swing. Interestingly, the ball’s speed has no gameplay effect. The only thing that influences the opponent’s chance to miss is when you hit the ball; any hit made when the ball is 90% of the way to its target on your side of the table will be a ‘perfect’ hit and have a greater chance of causing the opponent to miss.
The initial port of table tennis to flat was very 1 to 1 with this idea: you moved the paddle on a 2D plane and tried to line it up with where the ball was going to end up. This proved fairly challenging and not very engaging, however, which led to an idea of the paddle locking its height to the ball’s height when the ball was close enough to the paddle.
Eventually, this ‘lock-on’ idea became the current version with three positions the paddle can be: left, middle, and right. In Flat, the ball can only go to one of these three positions. The challenge of this implementation was making sure none of the new Flat mechanics broke existing VR mechanics, as both systems needed to coexist in the same blueprint, due to the game’s architecture.
Along the way, I was also able to make some creative decisions, through adding some additional mechanics to make the game more interesting. The first of these is the spin system. On harder difficulties, the opponents can add back spin to the ball, causing it to go in a different direction than it first appears.
The other mechanic I added is the Super Smash system. This is where characters use their special moves (like Aika and her baseball bat, and Taka with his multiball technique) in response to the player failing to hit the ball, and letting the ball just bounce off their stationary paddle.
Sounds of Adventure
| Project Lead/Tech Lead | Jack Bell (Yours truly) |
| Art and Design Lead | Katie Stevens |
| Project + SCRUM Manager/Concept Artist | Cate Boddy |
| Developer/Modeler/Texture Artist | Jesse Fazzini |
| Modeler/Texture Artist | Josh Kolkin |
| Composer | Jeff Bell |
I, and my co-lead, Katie, began concepting Sounds of Adventure around three, core pillars of gameplay: Rhythm, Combat, and Movement. Starting here paved a very clear design/development pathway, as every feature we proposed had to contribute to at least two of the pillars. This all eventually led to Sounds of Adventure being an Unreal Engine based, VR, Rhythm/Adventure game with full body tracking. Let's break that down a bit!
Movement
In Sounds of Adventure, the player moves through a series of linear levels, bound by a grid system; the 'Level Grid.' To move in this level grid, the player has a virtual D-pad at their feet — think like a Dance Dance Revolution arcade machine — and must step on the correct, virtual arrow button to move one space on the grid, in the direction they stepped.
We are able to detect when the player steps on the virtual D-pad using three, wearable trackers — one for the waist, and one for each foot. While perhaps a bit misrepresentative, this is often referred to simply as full body tracking (FBT) by the VR community.
Seamless Fullbody Tracking
While we did not originally account for it, a significant portion of development time was dedicated to making sure that the full body tracking was as seamless as possible for the player. The underlying issue was that not everyone puts the trackers on in exactly the same way, and not everyone is the same height.
The first solution we came up with was a manual calibration screen, where the player could drag their virtual feet and torso to align with their real body parts, but in practice we found this was very clunky. Instead, we opted for an auto calibration system, where, when the game boots, the player's virtual feet and torso line up with preset points, and the distance between the virtual positions and the trackers' real position is automatically calculated, and stored into a game instance, to be used as an offset for each body part.

Implementing this was initially a problem, since the trackers stored their position in world space, not the player pawn's relative space (where the feet and waist is stored), but the offset needs to be applied from the body parts relative to the trackers. The trackers store their position this way so each body part can move independently of one another, but it makes it difficult to attach other components to them and gives way to this kind of problem — pros and cons! Thankfully, after doing a bit of research, the solution was very straightforward: we ran the tracker's location through the 'Inverse Transform Location' node, which converted their world-based location into the same relative system as the body parts.
Rhythm
The reason why getting the tracking to be seamless was so important was because of the rhythm aspect of the game. All movement (arms, waist, and feet) must be started on the beat (unmute the clip to the right to get a better sense of this). After calibrating the tracking to be able to tell us when the player was moving, we were able to tell if that movement was on beat using MIDI events which are, simply put, triggers that run in the code, and fire when something happens — like a note being played — in a MIDI file.
MIDI has its pros and cons, though: unlike other, more common audio files (like wavs) a MIDI file stores the note and articulation data of a song, not the actual waveforms and sounds. Think of having the MIDI file for a song like having its sheet music, and having a wav file like getting an orchestra to play it. Getting these two file types to play together — allowing us and the code to hear the song — requires a specialised player; we used the plugin MIDI Engine: Broadcasters to handle this.
To the left (top) is one of the earliest tech demos/PoCs for Sounds of Adventure; a showcase of actors being driven by MIDI note events. This was shortly followed by another PoC designed to show how MIDI events could drive animations, and stay in sync while lots of other things were happening.
Working with MIDI
Before this, I had not worked with MIDI Engine, so becoming familiar with it took a bit of time (hence the above proof of concepts). MIDI Engine adds two components to UE, the MIDI Player and the MIDI Listener. The player component takes a MIDI file and a wav file and plays them together (with an optional offset) and globally broadcasts MIDI events. The listener component listens for these events, and can be configured to only listen for events on certain tracks (i.e. instruments) or even only listen for specific notes (e.g. A6).
This track filtering system was how we were able to 'compose' the enemy movement and attack patterns. Each enemy listened for notes on a track corresponding to its class (e.g. Standard Enemy, Enemy2, Boss, etc.). When it heard an A note, it would advance in its movement pattern — an array of Vector2s that told the enemy how many spaces in the Level Grid to move from its current space — and a G note would tell it to advance its attack — each attack had at least 3 'phases:' warning/wind-up, attack, and wind-down.
This is also how we were able to tell if a player's movement was on beat. We added a 'metronome' track to fire a note event every beat, and store a Unix timestamp of when the event fired. Whenever the player moves, we compare the UTC time of the last beat fired to the UTC time of when the movement started. Based off of the difficulty setting, we see how close these two times are, and plug the difference between them into a select node, that chooses whether the move was 'Perfect', 'Nice', 'Ok', 'Bad', etc.

Combat
The 'timing descriptors' (Perfect, Nice, Ok, Bad, etc.) are used to determine the player's combo, which is in turn used to determine how much damage the player deals; the combo acts as a multiplier for the damage done by a player's weapons.
There are three classes of weapons: big weapons, small weapons, and shields. The player starts with one of each: The Royal Shield, The Longsword, and The Claymore. As players progress through the game and defeat the boss of each level, they unlock that level's special weapon. Once unlocked, the weapon will appear in the HUB/Main Menu room for the player to equip, and bring into any level they would like.
This is only an overview of Sounds of Adventure's development and I'm leaving a lot out for simplicity — such as how we got the animations working, the checkpoint system, how we fairly deal damage to the player, and more. If you're curious or have questions about these or any other aspect of Sounds of Adventure, please feel free to reach out via the contact info below. Hope to hear from you!
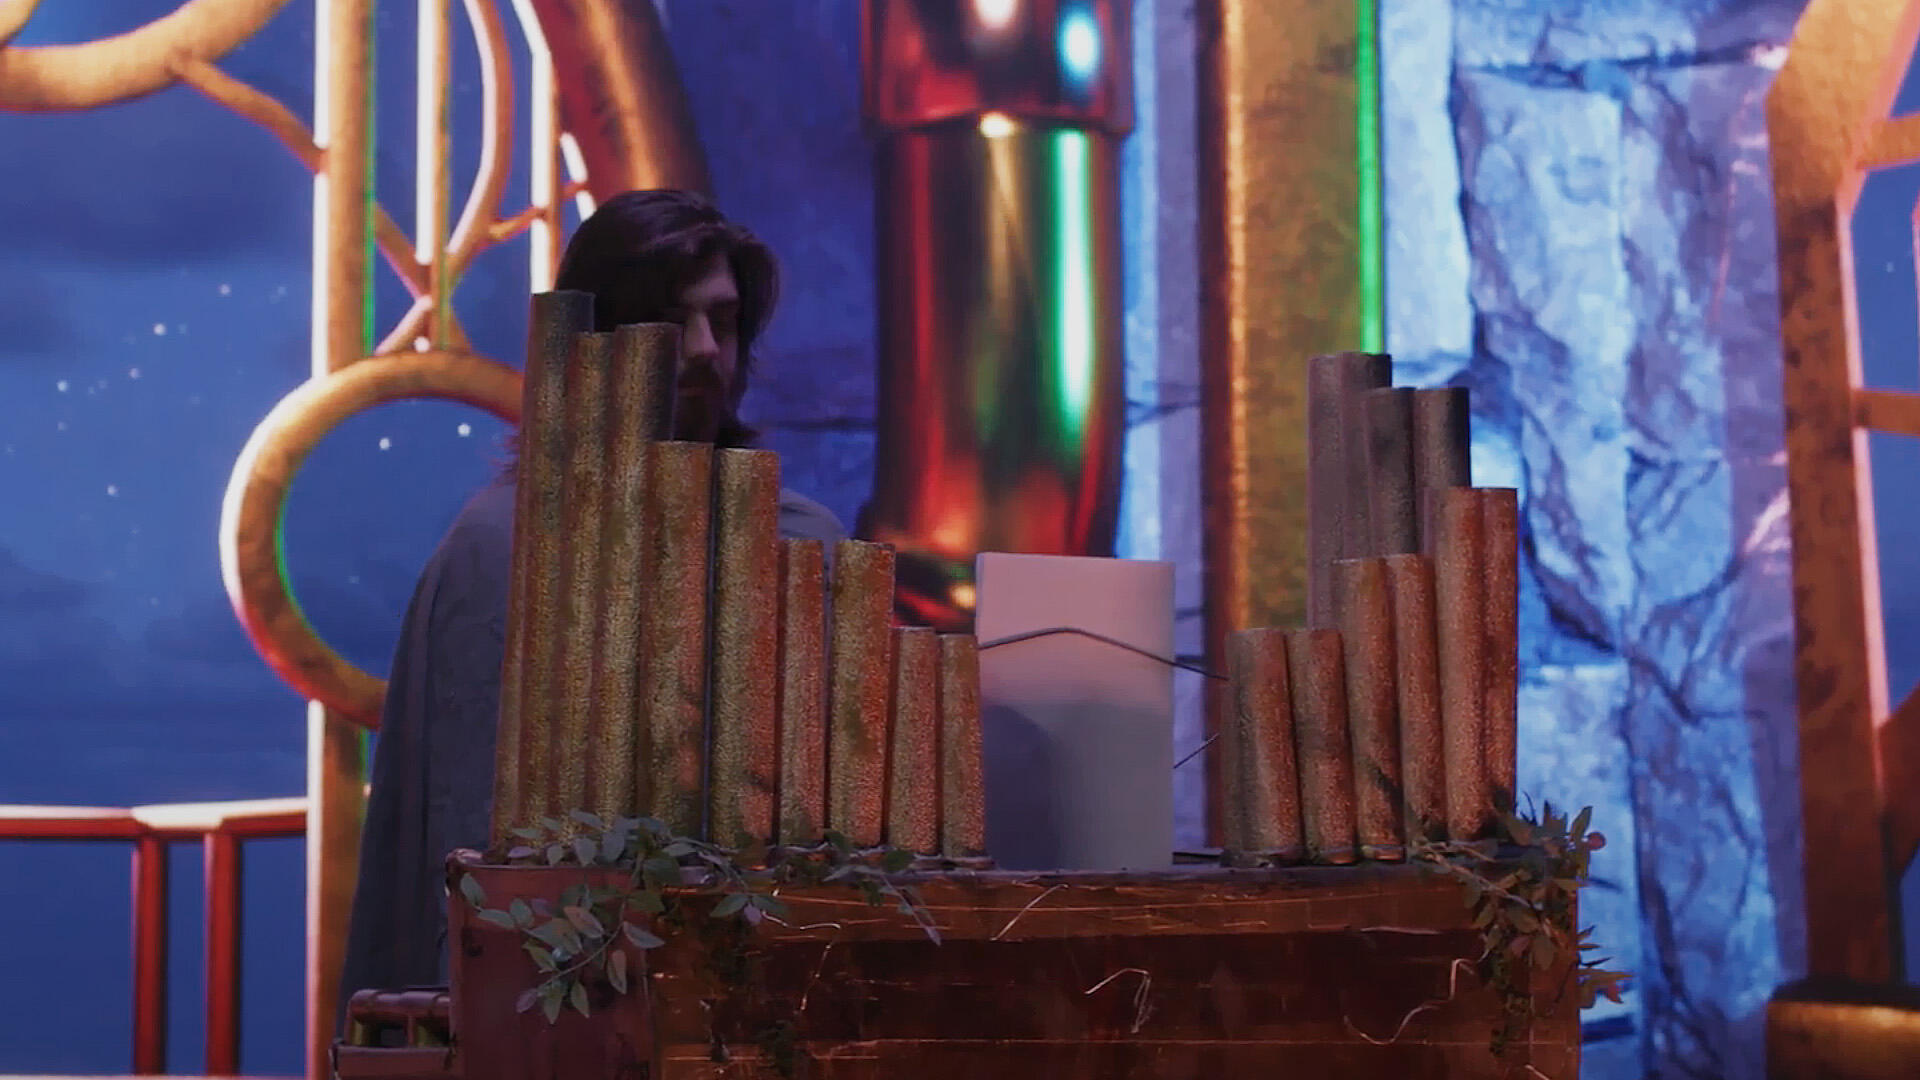
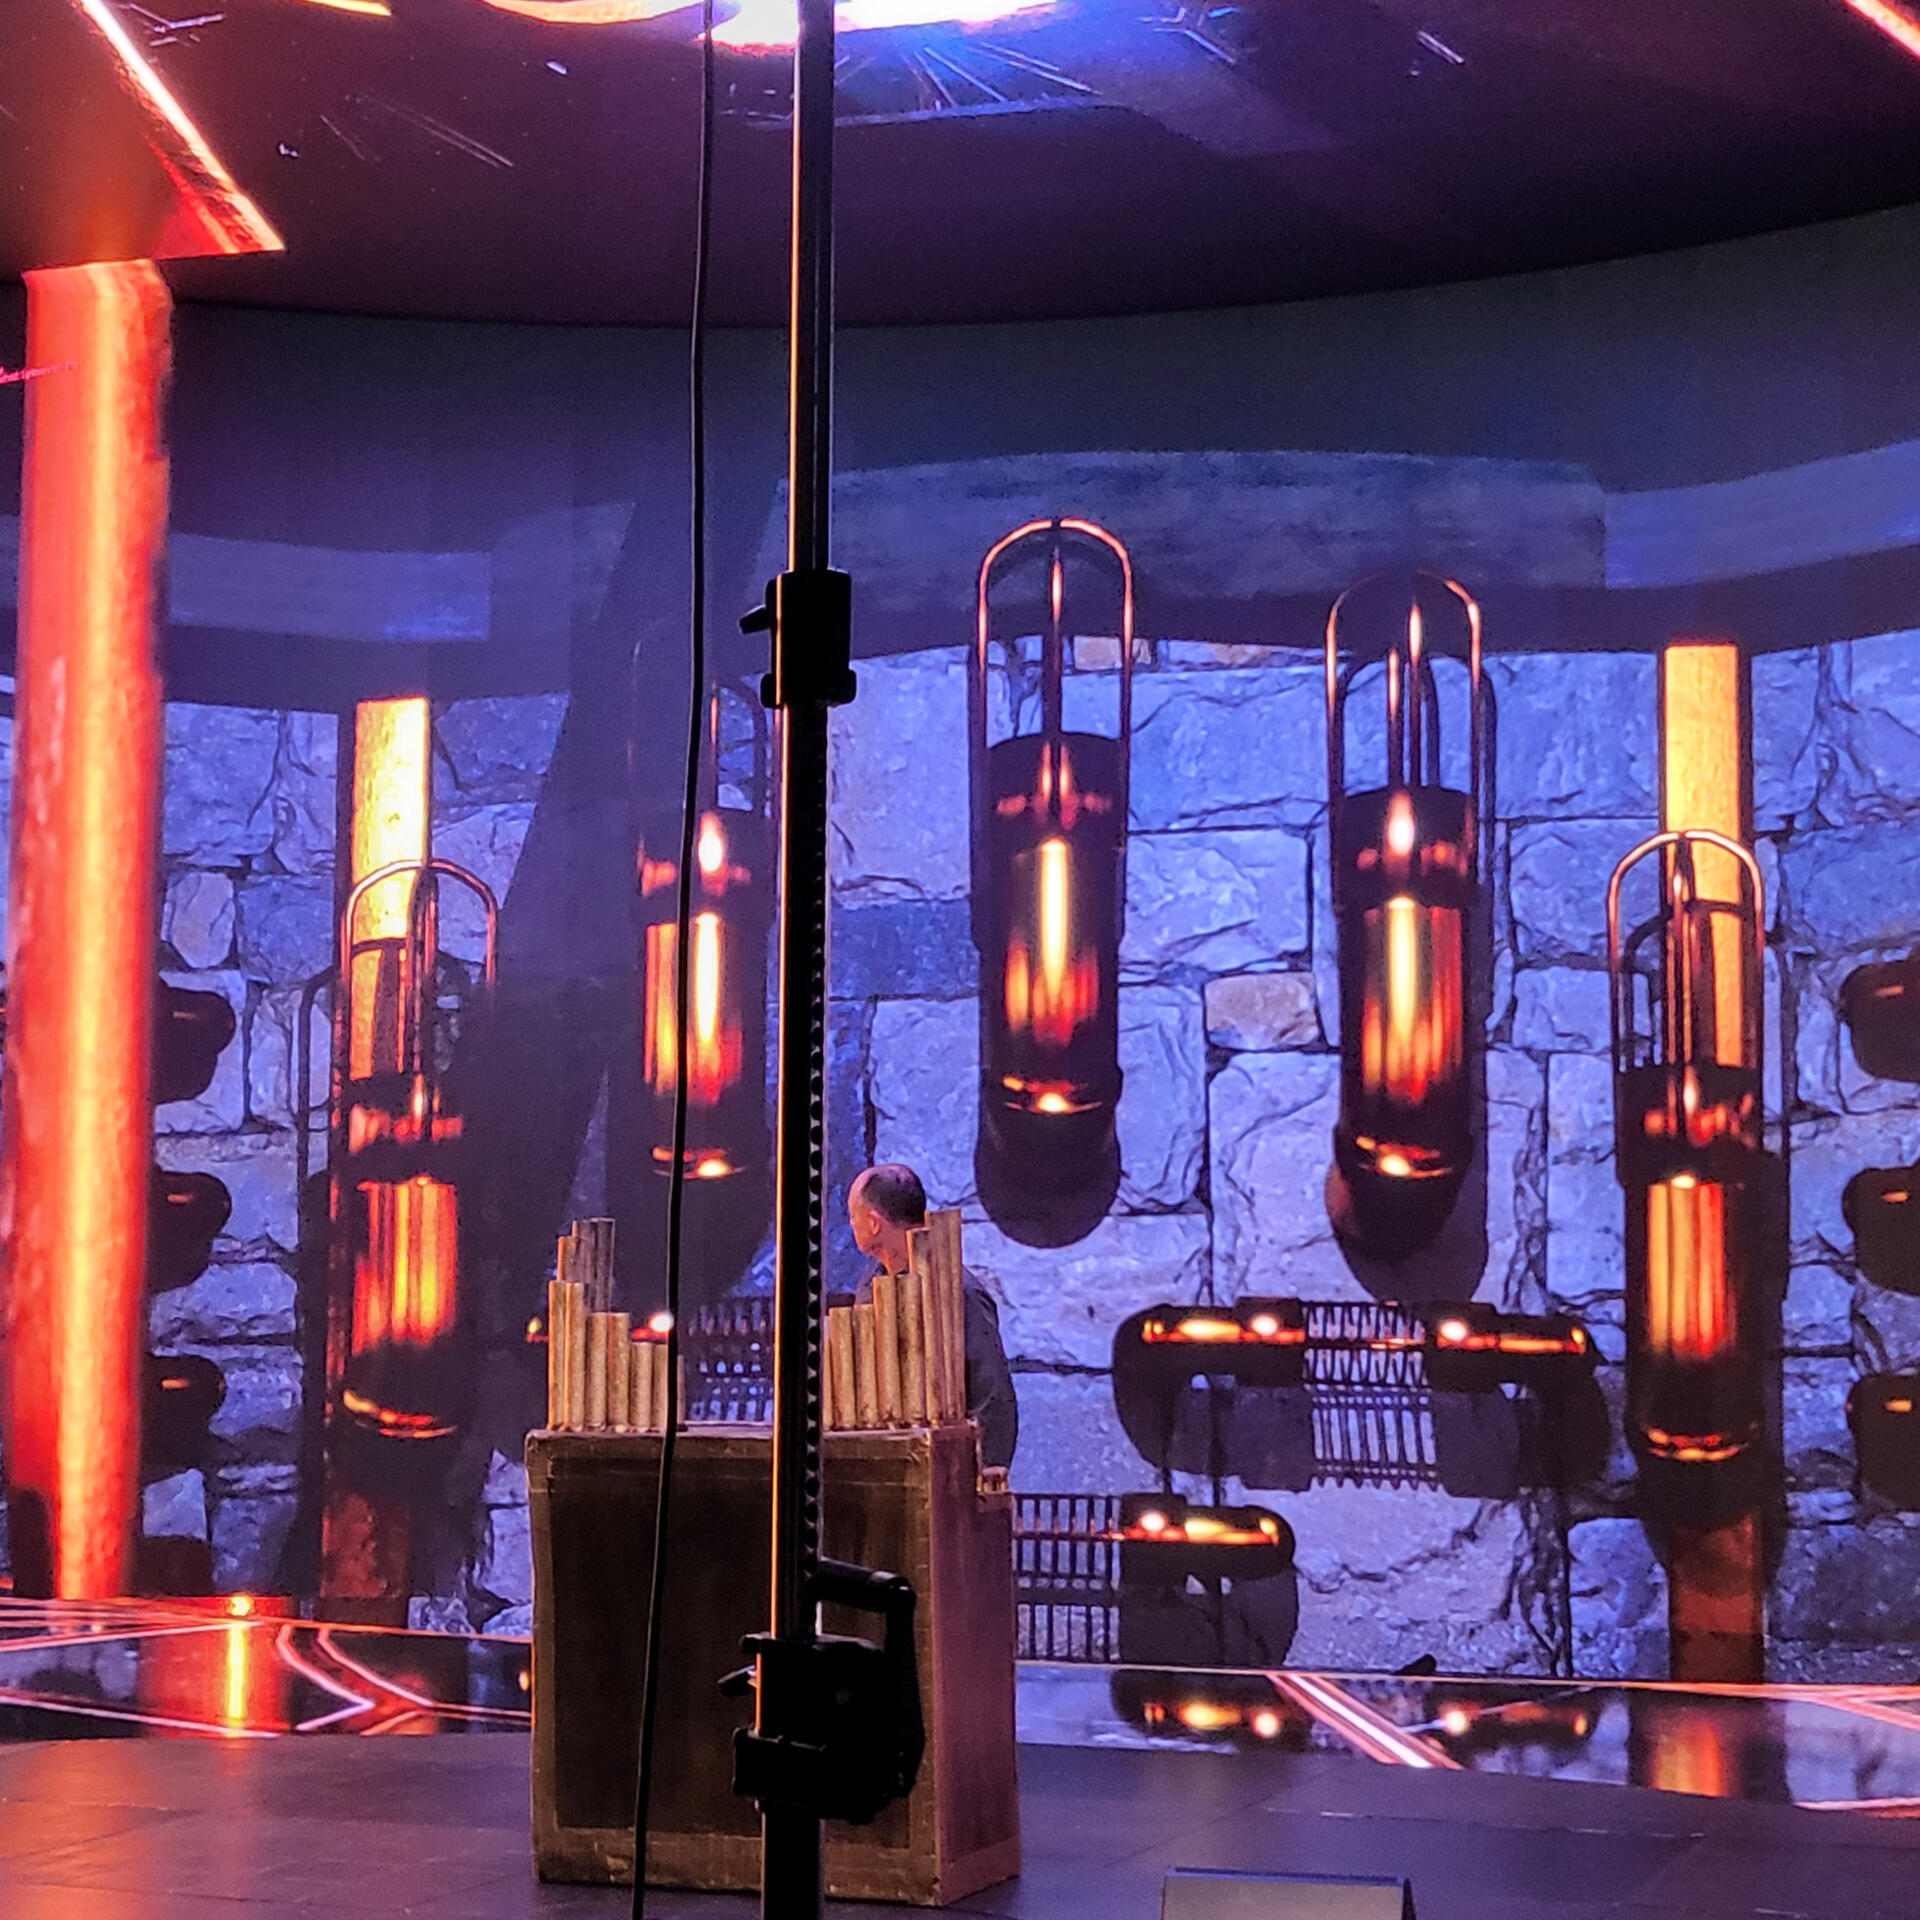
Arcane Melodies was a short video, filmed on an XR Stage (LED Volume). The project was primarily a tech demo; the goal was to showcase the ability to take a live musical performance, and — using MIDI — have the environment around them react in real time (like the lightning effects in our scene).We also showcased the ability to have a live synth/sampler (built with Unreal Engine's Meta Sounds) play notes based off of the performer's MIDI input, and both record the audio from this into the video, as well as allowing the performers to hear audio from the game engine on the stage — something that, perhaps surprisingly, is not a trivial task for this kind of setup.
SynthWave
In SynthWave, I wanted to learn more about VFX in Unreal. This was also right after the release of the Harmonix plugin which finally brought official MIDI support to Unreal (big asterix there, but I digress). So my goal with the project was to drive VFX with music.The experience is played with a MIDI keyboard and a mouse, using the left mouse button to move, and using the keys on the keyboard to fire the weapon. When the player fires their “piano gun”, a blob-like projectile arcs out, spewing globs of vapour-wave inspired matter that splashes onto nearby surfaces, showing a window into an alternate dimension.
Music/Code
When the main projectile makes impact, it spawns a cylinder of music, which plays through a looping chord progression (literally an array of integers), with the root note being the bottom note you played when firing the projectile, and the number of notes in the chord being the number of notes you played.
The timing is all driven by a single "Master Actor" running a Quartz clock to keep everything in sync, regardless of an individual "Music Zone's" spawn time.

Visuals
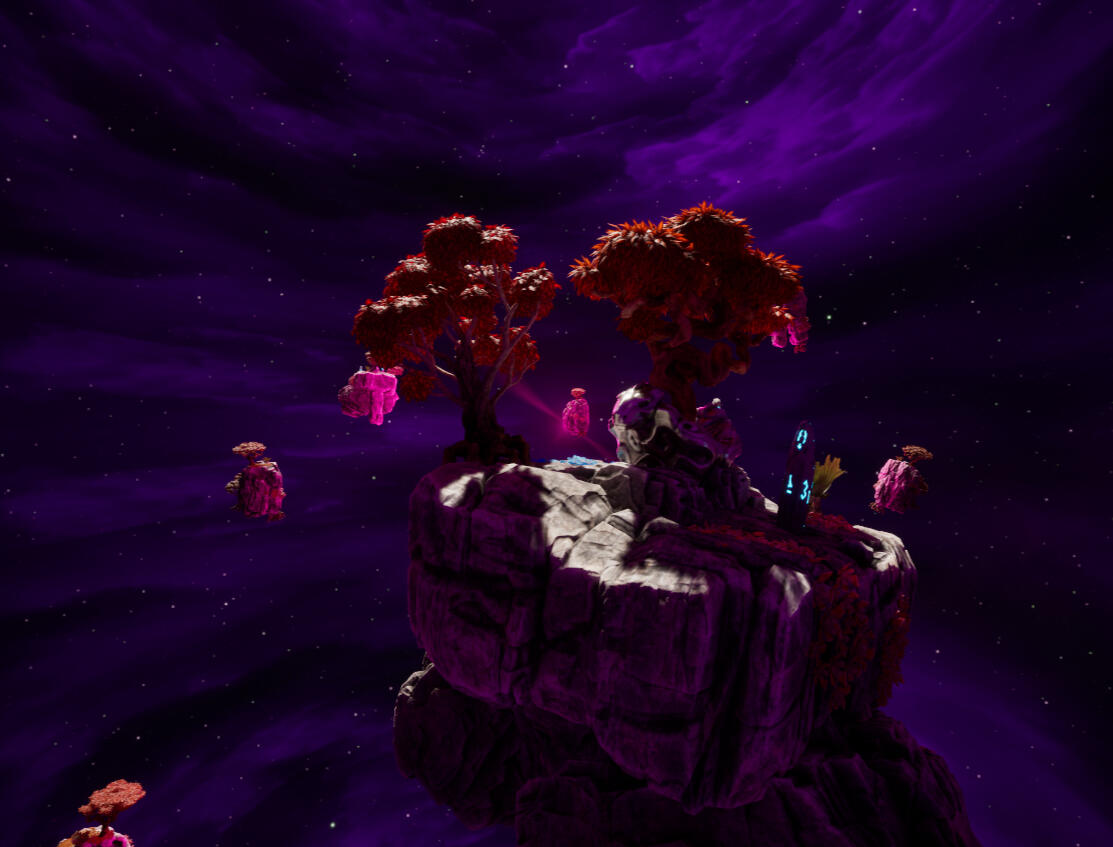
The core of the effects is a cube render target pointing at a bubble of floating islands in a space-like environment. The Islands bob up and down with semi-random speeds and timings to seem more natural, and there is also a panning cloud texture to add further depth to this scene.
Using a cube render target here allows me to feed the camera’s reflection vector as the UV map, which makes it seem like the player is standing at the centre of this scene regardless of where they’re actually positioned.
This is the cubemap that is fed into the decals that spawn when the projectile lands. The other half of the decal effect is a cylinder that seems to radiate off the edges of whatever surface the decal has been projected onto. This effect is achieved by getting the distance from the surface and using that to set the transparency, then getting the normal of the nearest surface, and using that to power the direction of the panning ‘energy’ texture. To make sure the cylinders don’t overlap in unsightly ways, all of the calendars are actually stored in one, dynamic mesh actor, that uses boolean mesh operations whenever a new decal spawns, to make sure the energy-radiating effect only appears on the edges of the decals.
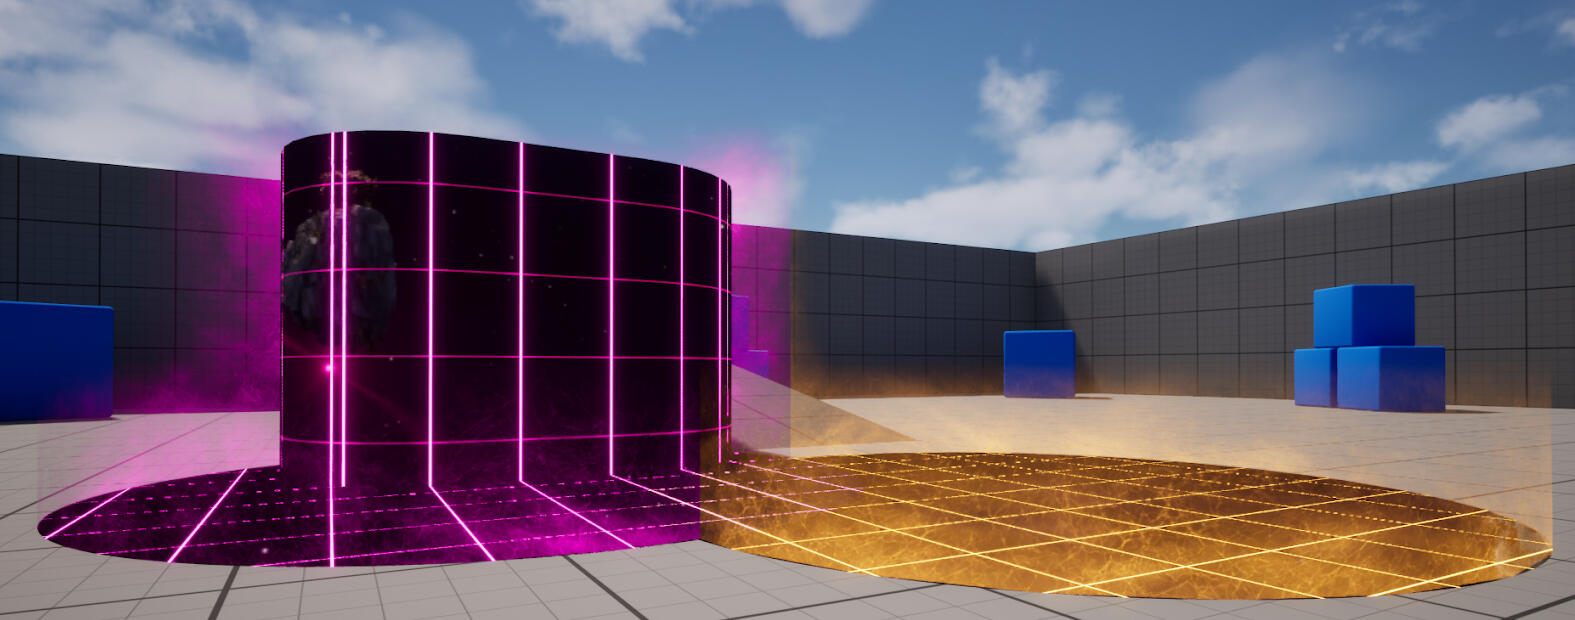
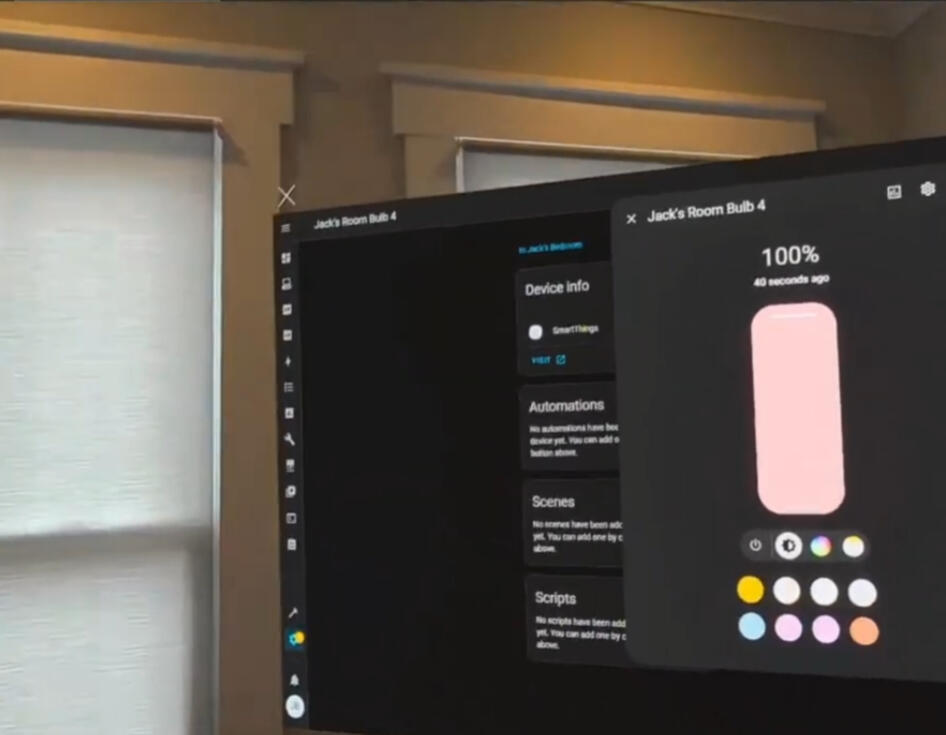
Home Assistant: XR
Home Assistant: XR (or HAXR) is a mixed reality application that allows someone to map their devices in Home Assistant (an open source Smart Home platform) to their physical space.This allows someone to, say, turn on a TV by physically tapping it, or use a virtual colour slider to adjust their lights in real time, etc.
Zen Dwarves
What is it?
ZenDwarves (working title) is a relaxed, low-poly game about mining and delving into lost places with friends. The goal is to have the game available on Steam sometime in October, with support for multiplayer and crossplay between VR and PC.Here, I'll be posting my devlogs about what's been updated this week, as we approach release.
Week 6
Features System Pt. II
This week I finished up the foundation I laid last week with the system to check the bounds for feature spawning. A big goal I had was to make this system as modular as the ores system is, so adding new features is a breeze. Thus, I went with a very similar approach: There is a base class for features with most of the spawning logic, and a data table that tells the world how to spawn in the features (height range, preferred height, and max distance from the world's centre).
Week 5
Features System Pt. I
A big priority of this week was how to obtain the molds I added in last week. Thus, introducing the Chest! When the system is finished, chests can spawn as a part of features, and have random loot tables. For molds, specifically, they can check with the mold rack to see what ores the players have unlocked, and only spawn a mold if the players haven't unlocked it yet, or spawn something else if they have.
I also laid the ground work for features to spawn within the 'Minable Area,' and make sure that they don't spawn partially outside of the Area's bounds. More on this next week!
Week 4
Crafting System Pt. II
Starting off with something fun: visuals! Now, when a metal gets poured out of the smeltery, it flows down the channel into... a mold! I'll talk about the molds in a second — the major part of this week's update — but first, the animation. I've been trying to master Unreal's Shader graph lately, so I've been sneaking in more shader-based effects when I can! For this, I aligned the 'channel liquid' mesh's UVs along the slope of the channel, so I can push a simple mask onto it, then off of it, along the path of the liquid.
Now onto the molds. Last week, I had it so that having just the ores would allow you to update a tool's head with new materials. However this approach, one, didn't feel as fleshed out as I wanted and, two, would make it hard to add new head types (i.e. the hammer) later down the line. So now, based on which mold is in the smeltery, that kind of part gets produced, and you can use that part to upgrade your tools. I also added a QOL system, that allows you to pour out anything in the smeltery, whenever, making it easier to make parts that aren't made form alloys
Week 3
Crafting System
This week was the crafting system! Progress has slowed a little bit, since I'm having to replicate systems across Pancake and VR, and it's not always possible to make one system work for both game modes. The alloy system, for instance — which allows you to combine two ores into an alloy — works by placing ores into the furnace, so it works fine in both modes.
However, the Tool Forge — which allows you to upgrade your tool with new head types and new head materials — is a menu in Pancake mode, which doesn't work in VR, so two separate systems are needed for it. Additionally, playtesting the crafting system showed that VR mode needed some Quality of Life features (like a ranged grab, and a way to record VR demos smoother), so those also needed to be implemented, to help flesh out the VR side of the crafting system.
Week 2
Pancake Mode
This week was all about the other half of this game: Pancake mode! (Or, in less whimsical terms, Non-VR mode). Unlike VR, Pancake mode necessarily has a lot of menus, which is not something I had noticed before, until I had to develop the same exact systems, in both mediums.
Like in VR mode, in Pancake mode you can mine, equip/unequip tools, and open your inventory, which shows you all the ores you have (and all the types of ores you've encountered), as well as allowing you to drop ores you've mined into the world.
Week 1
The Inventory
This week, I added a usable inventory. The Inventory displays all the ores the you've mined so far, and shows how many of each you currently have. In VR Mode, you can grab ores straight out of the inventory, and put them back in at your leisure.
The Starting Line
Where are we, so far?
Currently, the basic systems for mining, tool upgrades, and procedural generation are in the game. However, all of these systems have been built modularly, so it's incredibly simple to add onto them: adding a new ore type only requires adding a line to a spreadsheet, and this will also add the corresponding material for tool upgrades.